TEMPLE FORTRESS GAM208
- david chodkiewicz
- Dec 28, 2025
- 16 min read

Project Outline and Aims
For this project I intend to create a long-lost fantasy temple/fortress, possibly devoted to some kind of animal god, but this will be considered as the assignment progresses. My build will be of modular construction using a low to high poly workflow. I have chosen this project because it will challenge me to work on something outside of my comfort zone in terms of genre. Usually my work is more dystopian/ science fiction orientated. The central focus of my scene will be an alter upon which will be a placed a mystical weapon of some description. I would like to experiment with using a very limited colour palette as I feel this will help me to convey the mood and overall feel of my scene. I want it to feel like autumn but maybe winter has started to descend early.
I have several personal aims for this project, to push my knowledge and understanding of modularity in set creation, to gain a deeper understanding and to develop my skills in texture creation, to take my first steps in creating foliage and to develop my skills in Zbrush and Maya and consider how I can make better use of a low to high poly workflow.
Concept, Block out and Iteration
To get started I began by gathering refences of various parts of ruined buildings, structures, trees and rocks to try and help give me some visual direction.
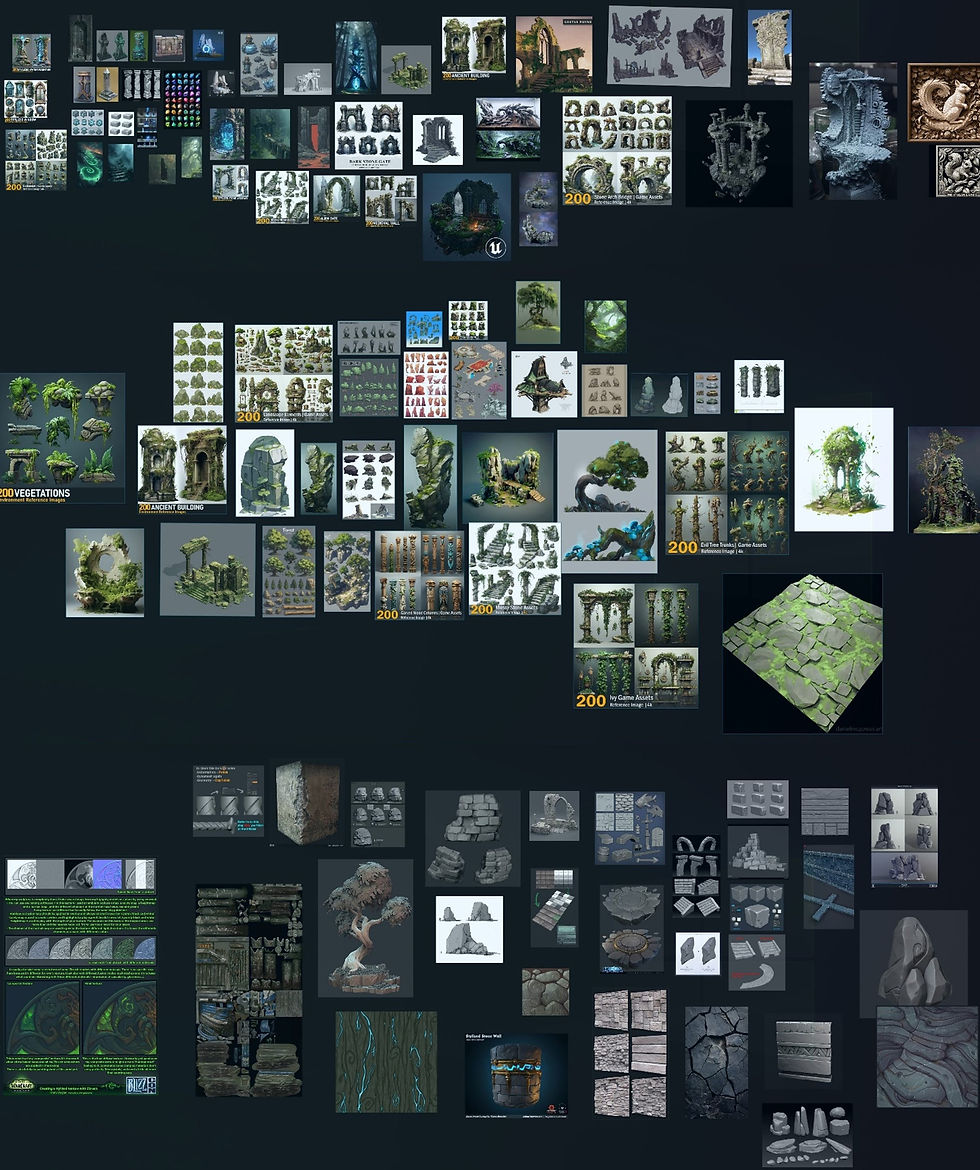
Whilst gathering references I always try to keep in mind what I would like my piece of work to look like and find images which are of a similar style. This helps me to better visualise my project.
I then proceed to develop a sheet of thumbnails of various structures. I want my scene to be a stone ruin with (as a stretch goal) ivy, heavy roots and foliage growing in around the broken building.
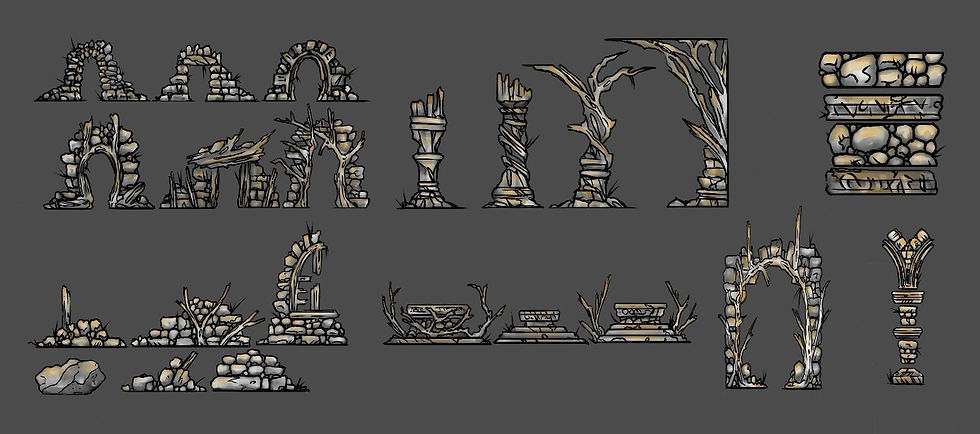
Again, as this style of work is something which is out of my comfort zone, I decided a good course of action would be to go straight into modelling and try to create various wall structures so I can further plan how might be the best way to create my piece.
Starting out in Maya I create low poly forms. Trying to keep bevels and edge loops to a minimum (I am also bearing in mind the overall polycount once my project is completed). I then take one of my chosen assts into Zbrush for further refinement, adding details to try and achieve the desired effect and finish with a high poly version of my original model. Once completed both low and high polys are then imported and baked together in Adobe substance painter where the texturing process begins.
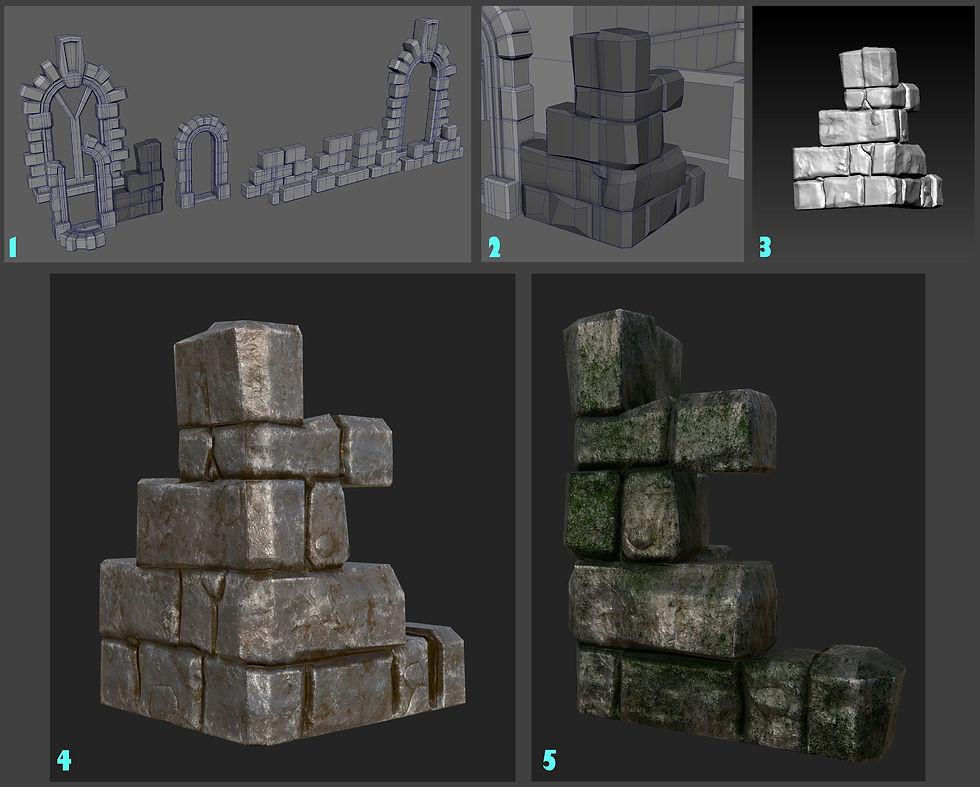
I was happy with the outcome of this test piece and decided that this method would suit the way that I wanted to put my scene together. From here I decided to move forward with blocking out some rough building layouts to try to determine scale and scope.

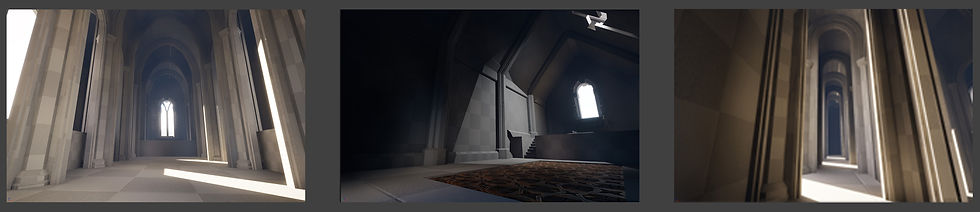
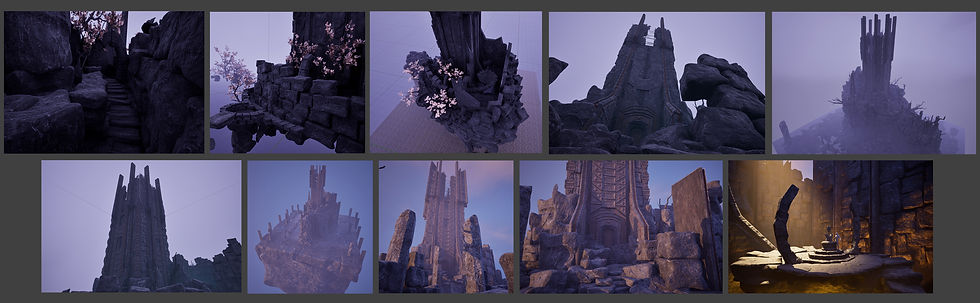
At this point, I was not happy with anything that I was creating and struggled to decide whether I wanted to do an exterior, an interior or a mix of the two. The above iterations would have suited a crumbled ruin covered in foliage and surrounded by trees and vegetation, but I was unsure if this was the direction I wanted to take. For me the scale was not there so I pushed forward with a new set of blackouts, this time with a grander interior scene.
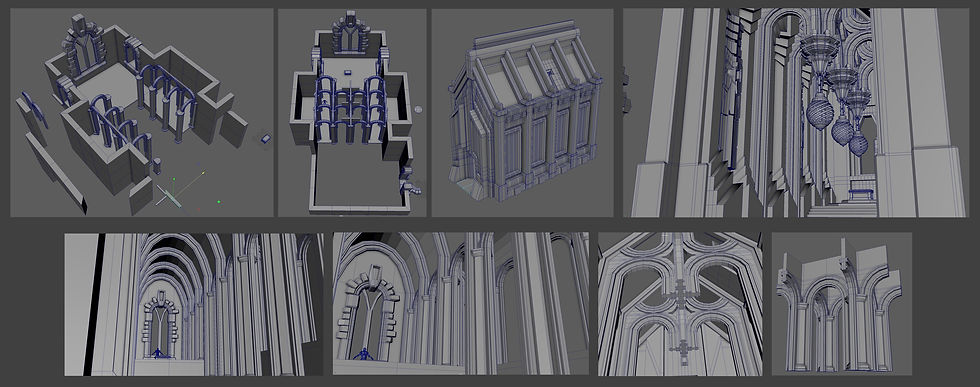
Despite changing and developing this idea further I still did not feel satisfied with the end product. My scene, I felt, was falling flat and was giving me no sense of narrative. For me, this is important because if a piece of work does not hold my full attention or interest, then I struggle to persevere, even at this early stage. At this point I decided to take the blackouts which showed the most promise into unreal engine for further exploration.
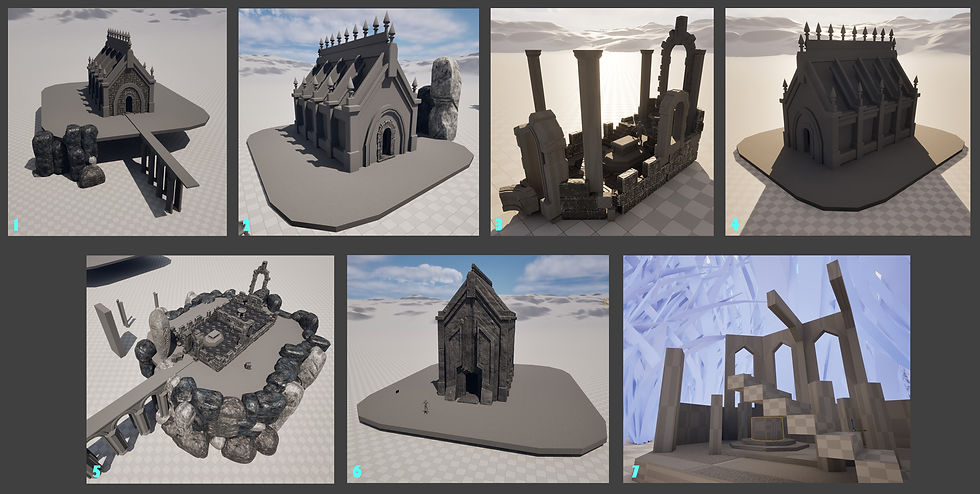
As can be seen in the above images, I have tried a few variations of my build, even trying one that involved shrinking my scene down to a tiny scale and surrounding it with blades of grass (as if this ruin was once constructed by mice as can be seen in fig 7). Again, nothing was grabbing me! I even set about creating some block outs of the interiors.
I knew I had to choose something and focus on it, as time was running out. I decided to go with building 6 which can be seen in picture 1. I felt that this gave me the most scope; I could have a nice untouched interior, but the surrounding area is laid to ruins almost as if this sacred space is protected from time as well as the elements.
Working between Maya, Zbrush and Unreal I got to work creating and placing assets as well as also creating some place holder textures to help bring the scene together.
Again, getting further into this iteration I found myself at a point where I really was not happy with what I was producing. For me it felt too sterile and lacking any character or narrative. At that moment I realised I had been approaching this in completely the wrong way. With time ticking away fast I decided to do the unthinkable at this late a stage. I started again!!!
With no enthusiasm or inspiration, I set to work on trying to find artists who could kick start my motivation and imagination. After trawling the internet for what seemed like days, I came across an artist called Tomasz Strzalkowski (Strzalkowski, date unknown) on Artstation. His style of work was exactly what I was looking for and aligned with my ideas. This triggered my creative spark!
Strzalkowski’s workflows really grabbed my attention. His clever use of modularity and layering techniques left me really wanting to implement this way of working.
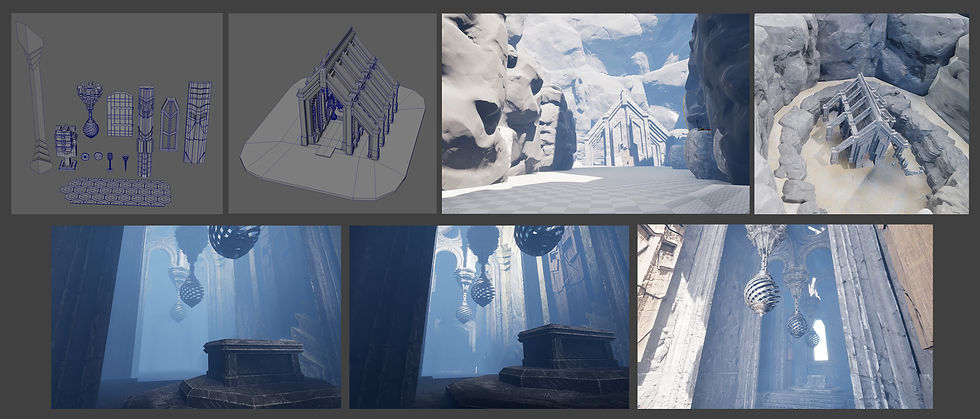
So, it was back into Maya to start afresh with the hope of re using some of the pieces from previous kits that I had already made. Very quickly my initial blackout came together and soon after I was back into unreal putting everything together.
From here, I started to refine my kit pieces using low high poly workflow jumping from Maya into Zbrush over to Adobe Substance Painter and bringing everything back into Unreal engine.
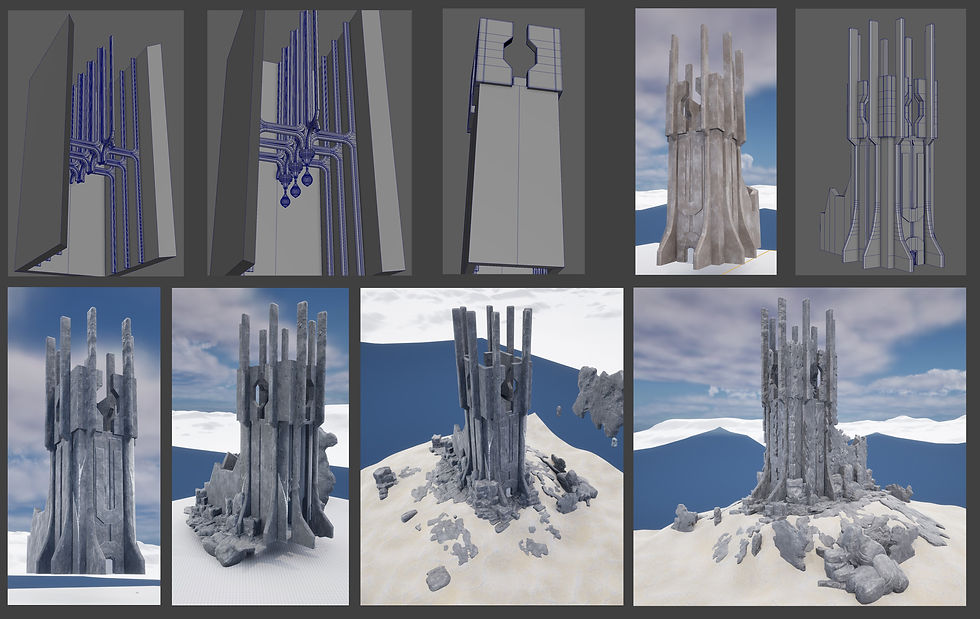
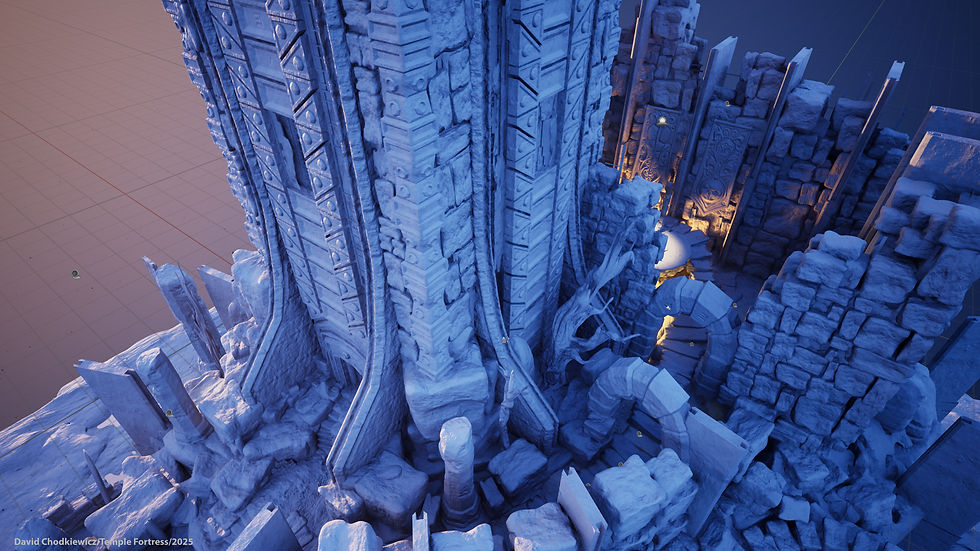
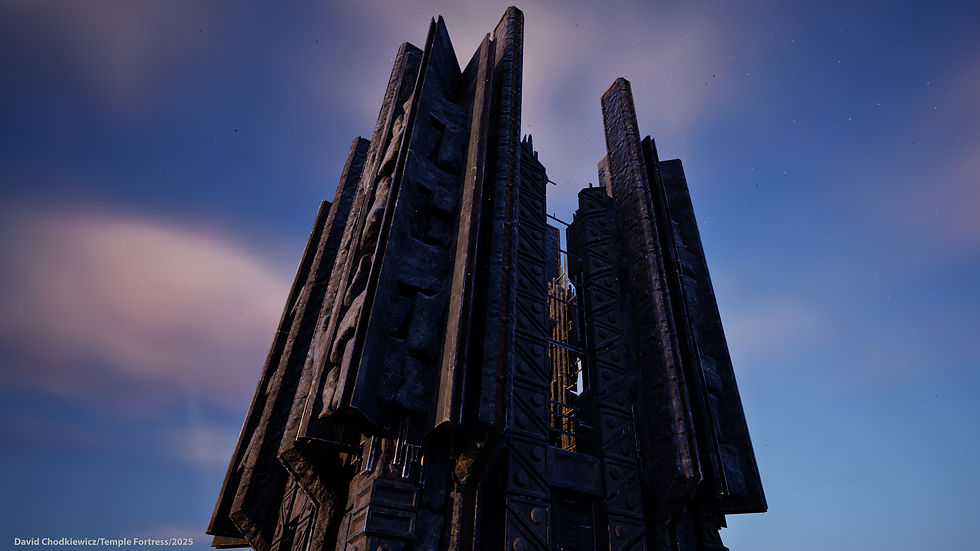
I used a technique of building up multiple layers of low poly objects of varying size, shape and texture. The build up of multiple layers gives a great impression of depth to my build and can be used to crate some interesting shapes and shadows instantly bringing everything to life.
The above gif is an example of how I layered up my kit pieces to give extra depth and detail. I used this process over the entirety of my build and overall scene. I feel, this has worked well with only a hand full of objects used in this process.
Textures, Texture materials and Decals
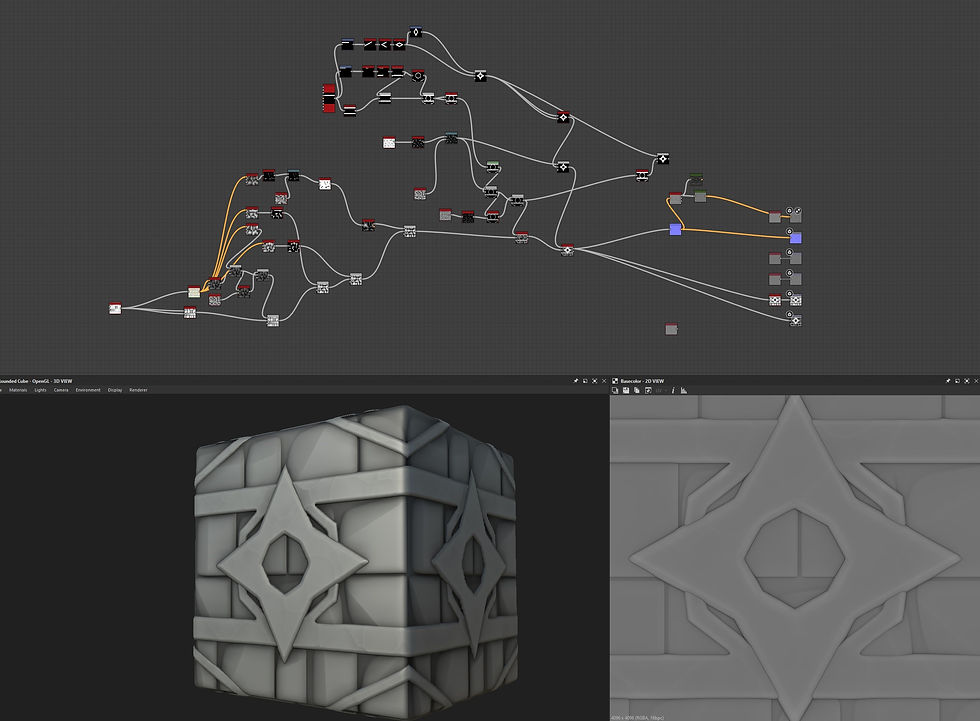
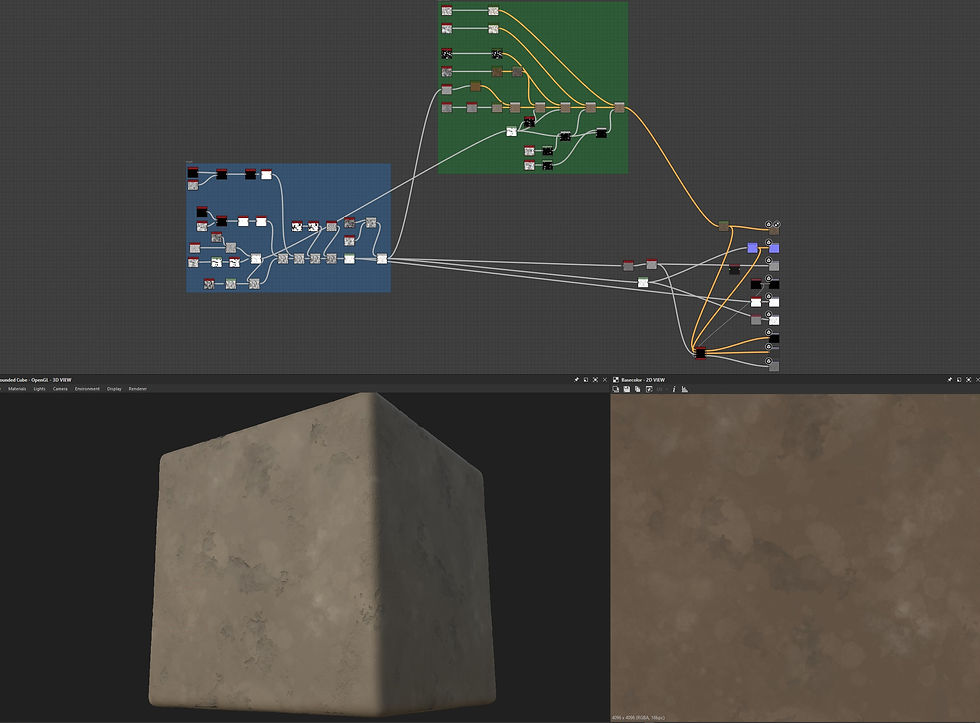
Although a large number of the object in my scene were textured in Adobe Substance Painter, during my initial build iterations I did experiment and create various tiling textures. I wanted to create interesting wall and floor materials that would suit the feel of my scene. My experience and knowledge in Adobe substance designer is somewhat limited, so the more advanced materials that I wanted to create were made with the support of online tutorials. This practice is challenging and frustrating for me as I find it stifling to be bound by what the tutorials are telling me to do. This often results in me not being satisfied with the end results as they rarely turn out exactly as I would like.
Here are different colour variations of a tiling floor texture that I created following a tutorial by 3dextrude (3dextrude, 2020). This was an interesting texture to create, and it taught me a few valuable lessons but unfortunately it did not fit the feel of my scene whatsoever.

Here is a coin texture that I had intended to use to create piles of gold coins, as if the ruin contained a long-lost treasure hoard. I created this texture following a tutorial created by takerefuge3d (takerefuge3d, 2023). Again, for me this texture did not work the way I had intended. I had created large soft mounds in maya and applied the texture to them in Unreal Engine, but I could not get it to look right. I felt I did not have the luxury of spending vast amounts of time on this so again I cut it from my project.
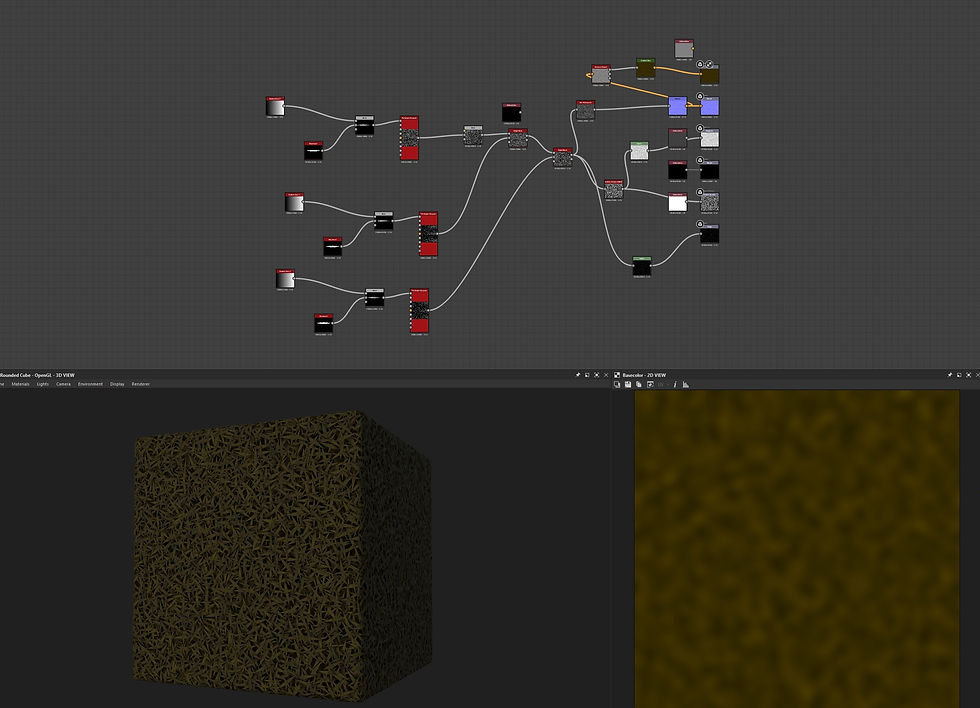
This was a grass texture I created to be used as part of my overall landscape but because I chose my landscape to be baron and desolate, I never used this texture. I created this texture following a tutorial by brainchildpl (brainchildpl, 2021)
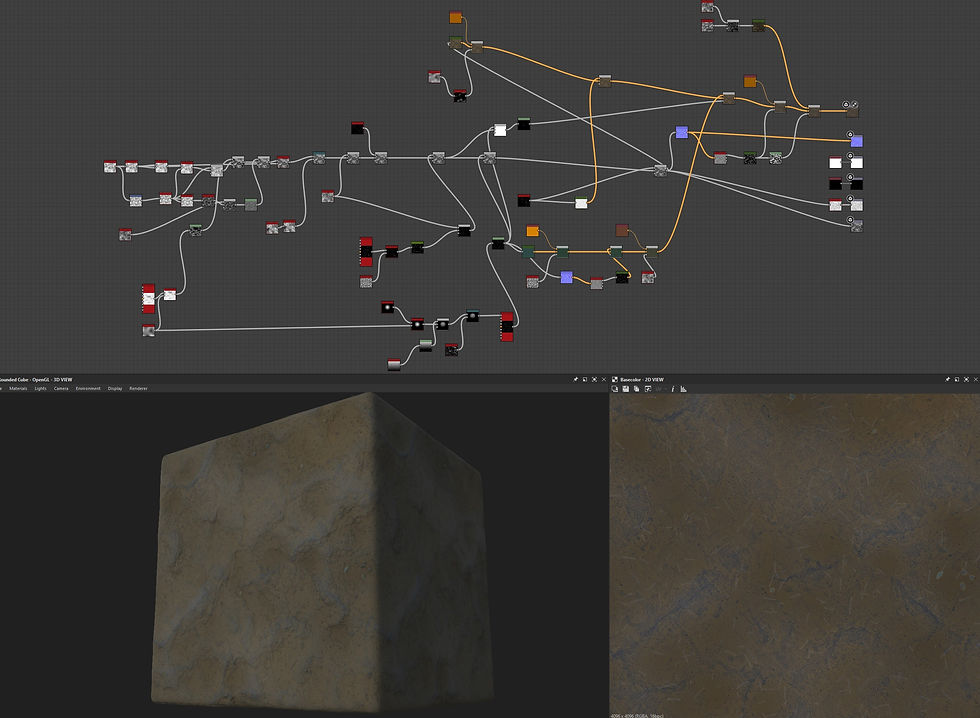
I created this texture to form what would be the base of the build, covering much of the landscape. Although not really seen in my build, I feel that this texture was my only solid success. Again, I built this texture following a tutorial by Poly Doorway (Poly Doorway, 2024)
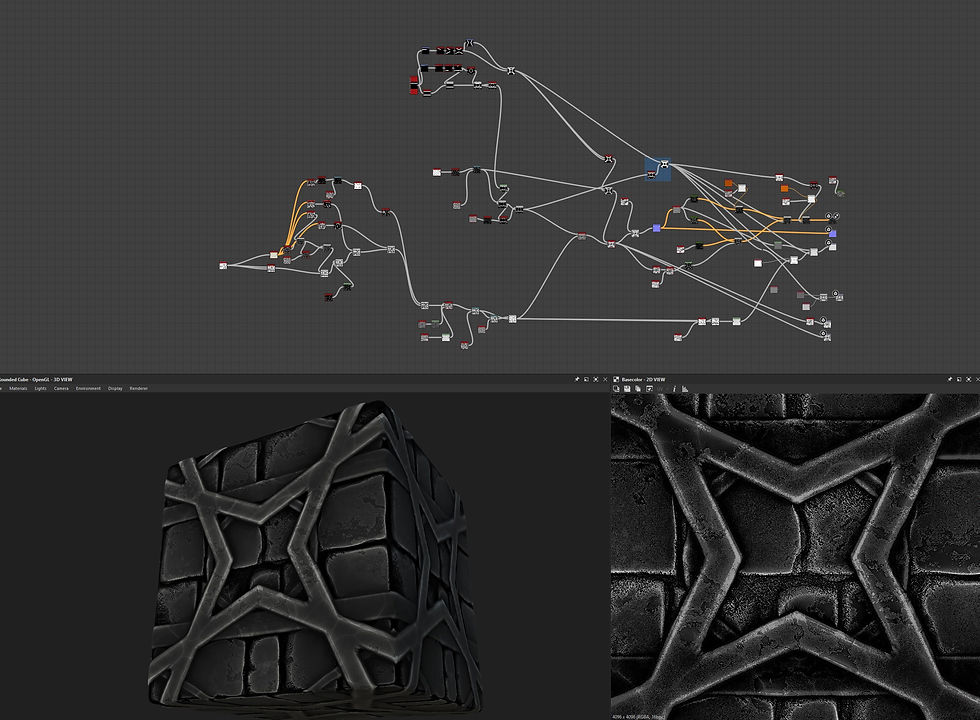
The following textures were ones that I created myself through learning and experimentation.
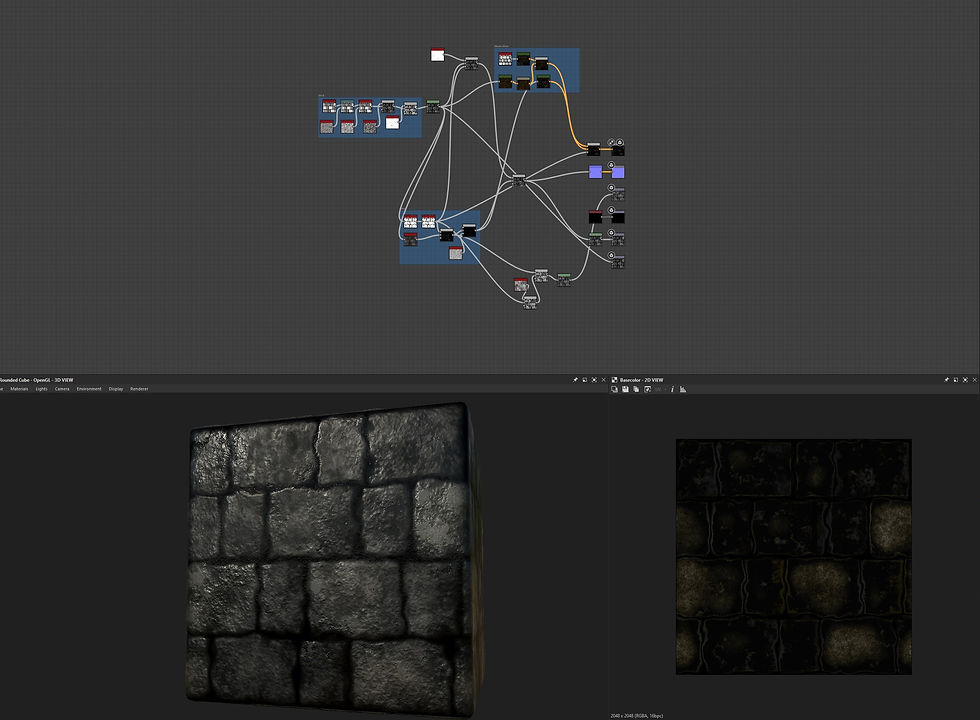
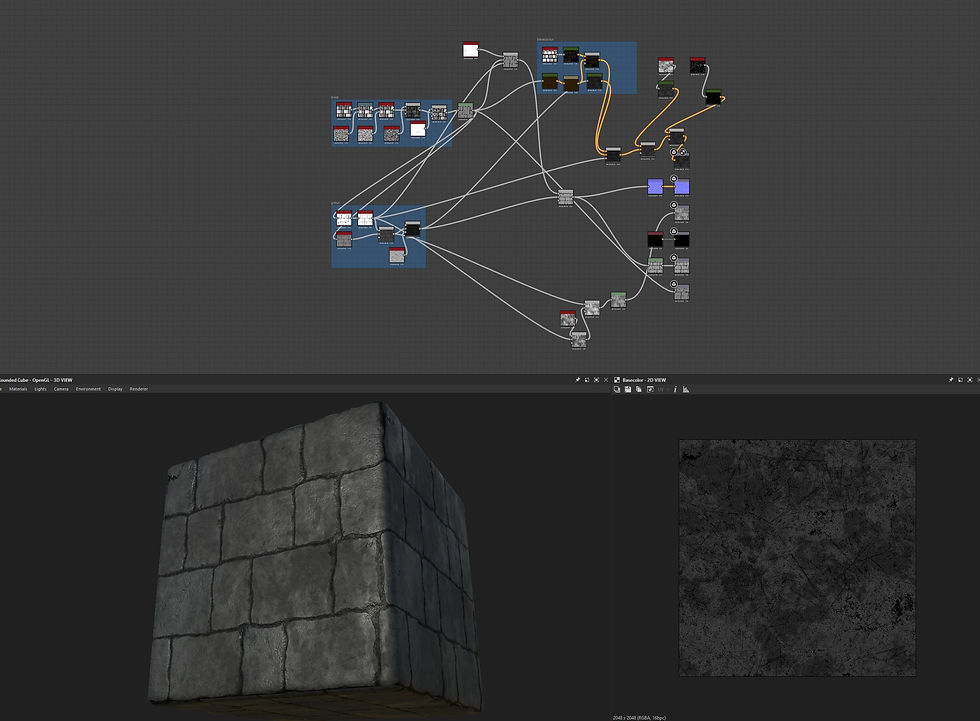
Here are two variations of a tiling stone material that could have been used for either floors or walls. These textures did not get used in my final build and on reflection I can see that better planning and consideration in the use of textures earlier on, might have meant these would have been of some use.
Although I still have some learning to do regarding having more control over my materials in engine (and I feel that this is currently one of my major stumbling blocks), I am hopeful that with some dedicated time spent on research and practice, this will be something I can overcome.

A tiling slate roof tile material intended for use on one of my original iterations, again this material was not needed in my final iteration.

Two variations of a tiling concrete material that again were not suitable and did not get used in my final iteration.
Although a lot of time has been spent on researching and creating textures that did not end up being used in my project, I feel that it was not a complete waste of time as I had some much-needed time exploring and learning my way around Adobe substance designer.
Although I have some work to do before I feel well-practiced in this piece of software, I feel that I am beginning to create a foundation on which to build upon. With some scheduled time allocated over the summer period I hope to return in year 3 with a deeper understanding of this program.
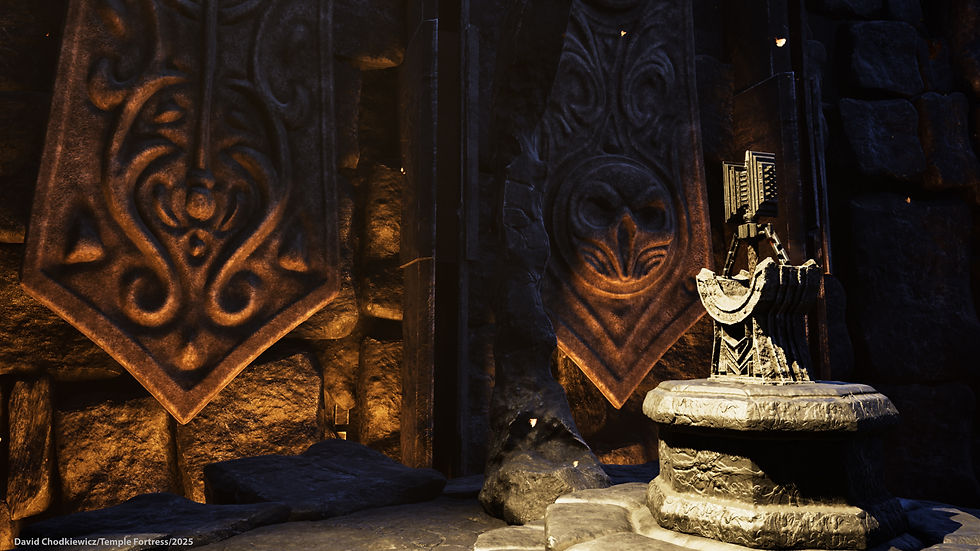
Although I had a limited need and use for decals I did create a small set of rune decals.
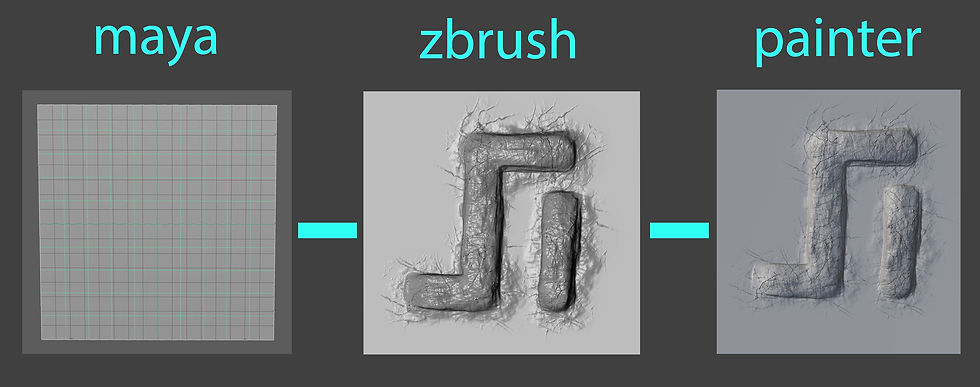
These were made using a plane created in maya which served as my low poly base. This was then exported and imported into Zbrush where I carved my rune onto the plane which then served as my high poly. Both were then baked together in Adobe Substance Painter. All I needed from this bake was the normal map as my intention for these decals was to act as a carving into the stonework of my building. Then in Unreal Engine a simple material was set up with just the normal map applied and my decal actor brought to life. This process was repeated for each of my rune decals.
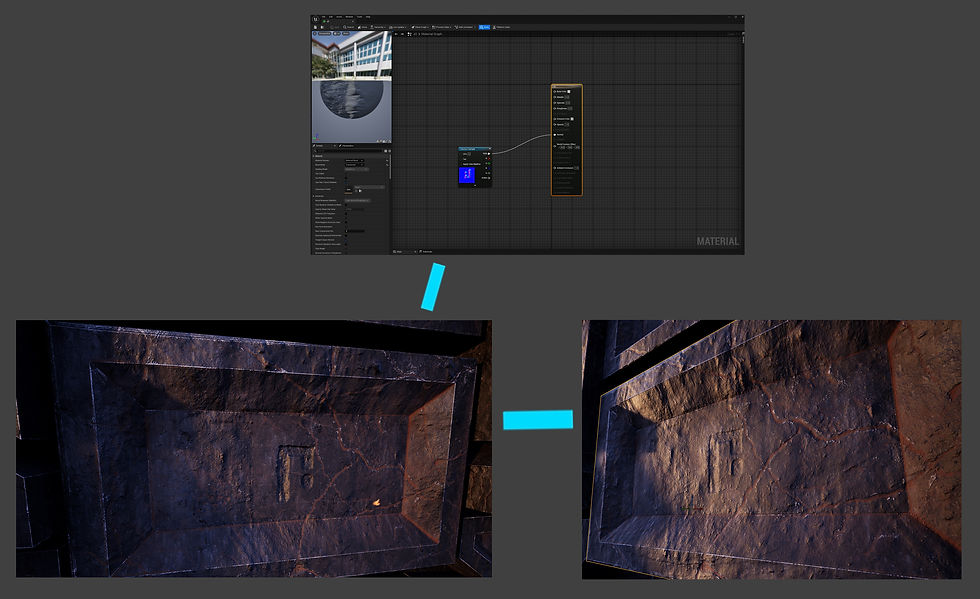
As can be seen in the above image the material set up was very straight forward, but once applied to the surface you could see the outline of the decal plane. With some slight adjustment of the decal depth in relation to the objects surface, this slight issue was easily overcome.

The set of runes I created as seen above are adaptations of the font Stray Regular which I downloaded for use in Photoshop.
Trees and Foliage
Initially I had intended to make use of multiple types of trees and foliage but as my project progressed this changed. I originally set out to make use of programs such as Speed Tree or Tree It unfortunately for me both options were not viable for me. Although the university have a licence for Speed tree, my home and work life does not allow me to spend much time at university outside of my scheduled timetable, meaning that most of my work is carried out at home.
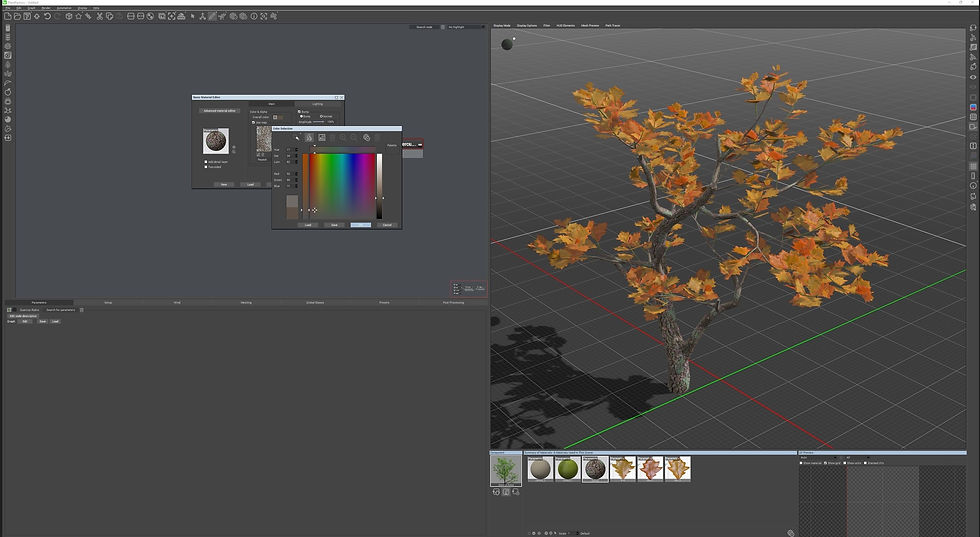
Tree it would not install on my computer despite several attempts. I did however come across another free tree and foliage generation program called Plant Factory. I did find this piece of software quite clunky to use but I did manage to make one tree which made it into one of early iterations, however it was not required in the final cut.
As I had come to the decision that I wanted my scene to look barren and desolate I decided that tree remains would better suit the scene.
I took to Zbrush and created a few twisted shells of dead trees. I found this to be quite a quick and straightforward process and although not perfect I was happy with my result. Starting off with simple cylinders these were stretched and warped into their desired forms. From here these cylinders were dyna meshed together to become one. Then using the clay build up brush I began building up and taking away to start to create a flow.
Through a series of subdivisions and pinning down the details I came to my result. This final sculpt acted as my high poly which was then exported through the process of decimation and z remeshing my low poly was born. This low poly was then exported into maya where it was uv unwrapped and exported again. Both high and low polys were then brought over into Adobe Substance Painter and were baked and textured. Then everything was brought over into Unreal Engine and applied to my scene.
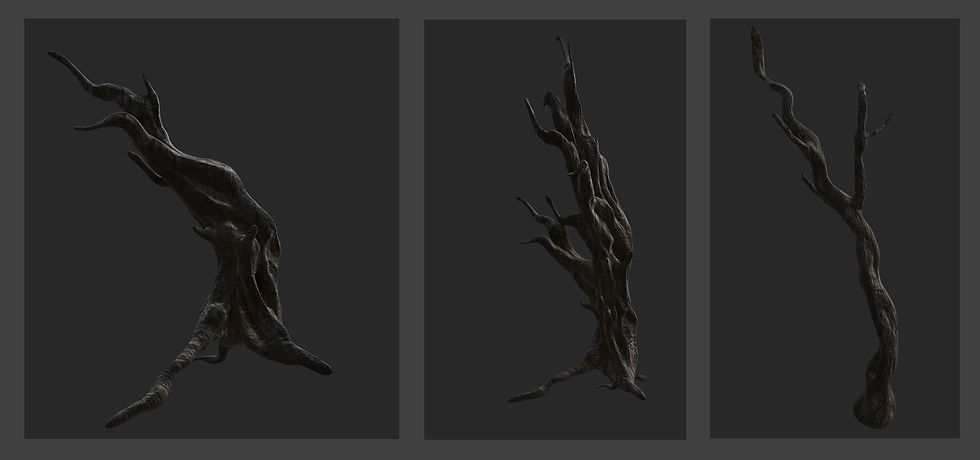
Overall, I was quite happy with how these turned out. Hopefully with a little more practice I will be more competent and confident at organic sculpting. I would really like the opportunity to experiment with Speed Tree or similar software.
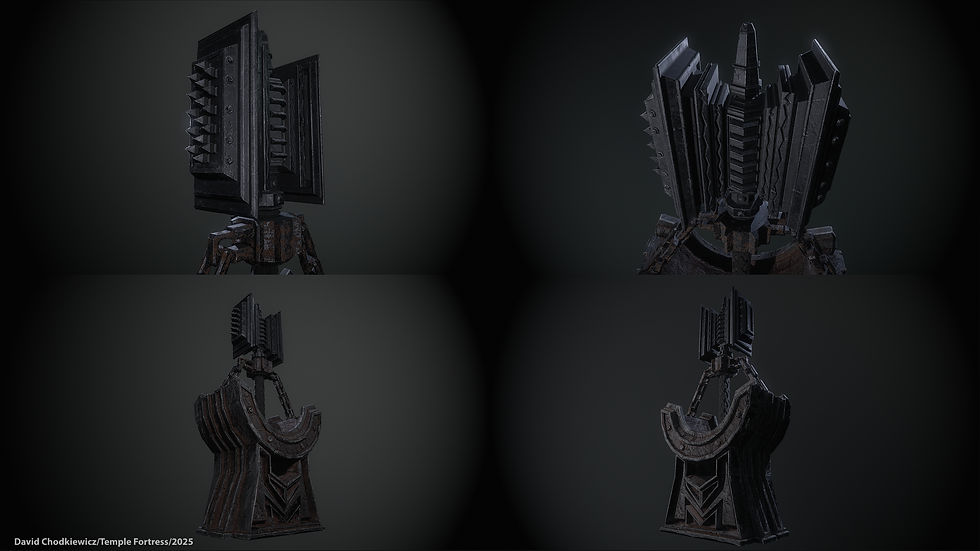
Hero Asset
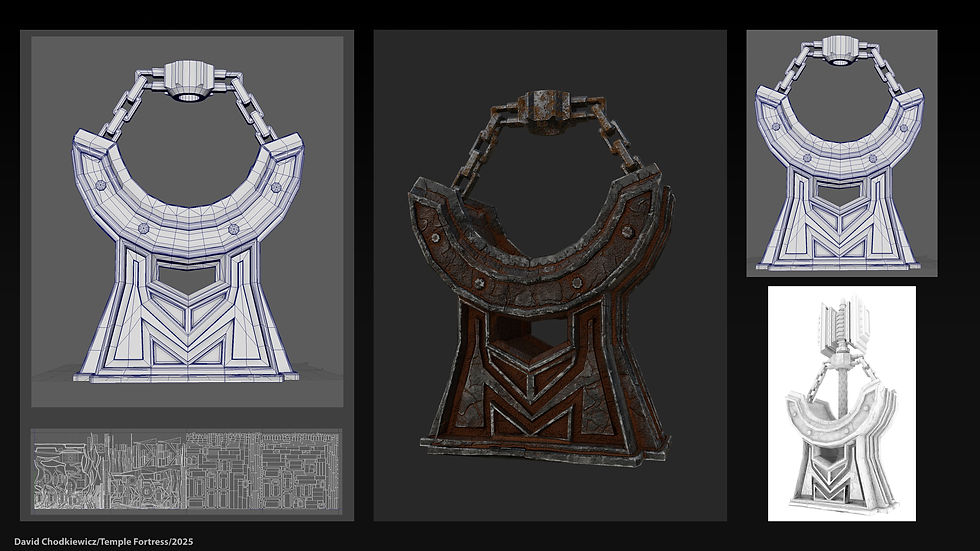
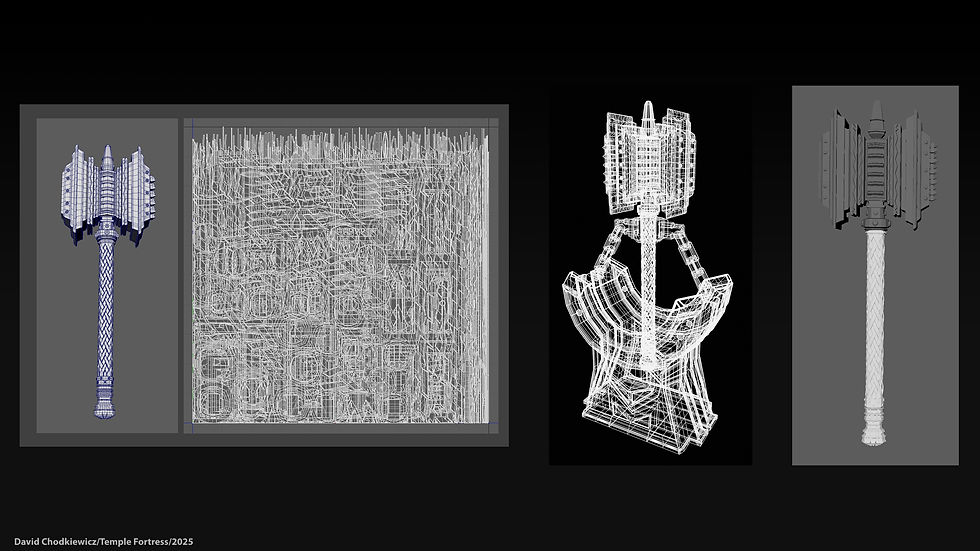
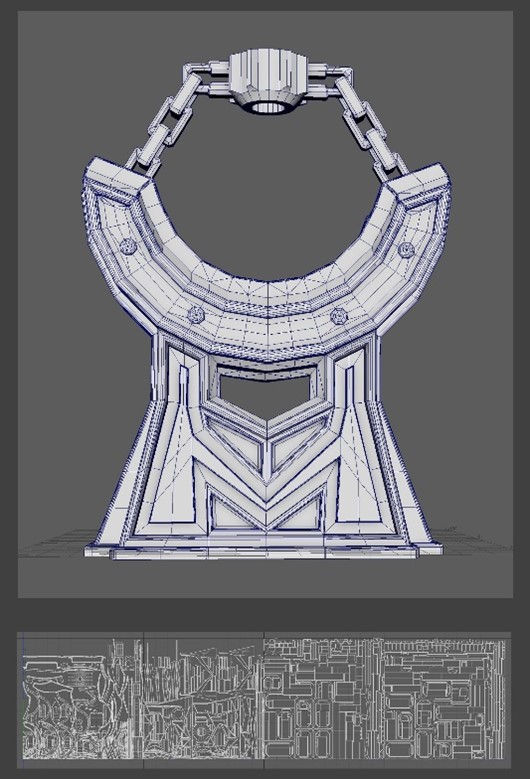
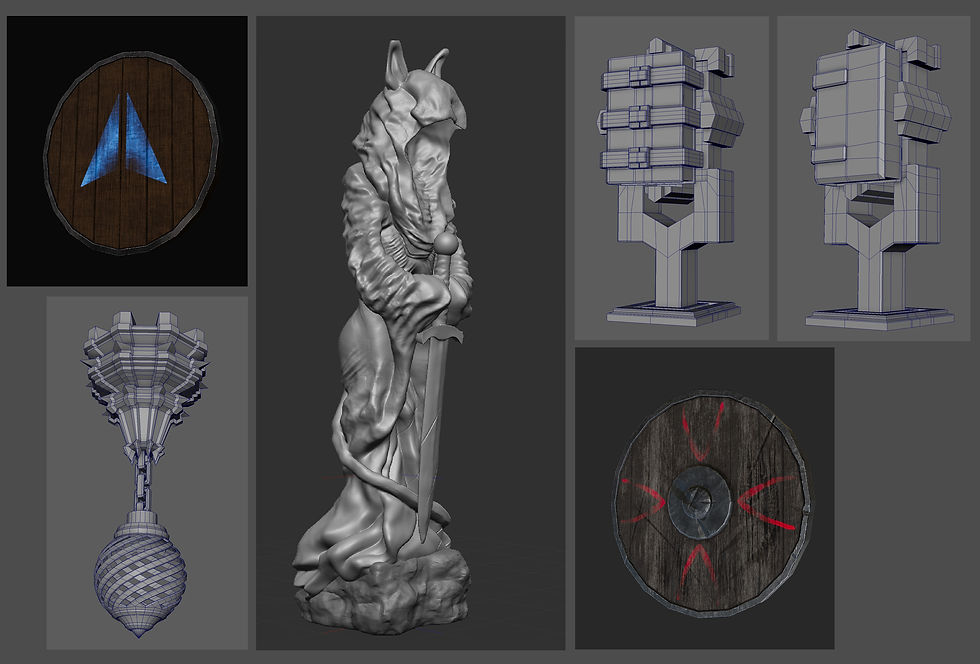
For my main hero asset, I decided to create a Warhammer being held aloft in an anvil like stand. A long forgotten but powerful relic abandoned in my ruin. For this I chose to jump straight into modelling using only a few online references as a general guide. I chose to do it this way rather than planning and concepting what I was going to make as I felt it gave me more freedom to feel my way around and make solid changes as I went. Being able to make changes and being adaptable at any given time of a project is a valuable skill to have.
I made my hero asset in two parts, the Hammer and the stand. Most of the modelling process was carried out using Maya which is where I created my low poly but highly detailed model of each asset. I then exported and worked on both individually in Zbrush. For the hammer I only added small surface imperfections but for the stand I added a lot more with cracks and imperfections over the entire surface, this then gave me my high poly models. From here, both models were exported and worked on separately in Adobe substance painter. This is where I added my textures and worked on the wear and tear effect. I wanted this “aged” effect on the anvil but for the Warhammer I wanted to create the feel that time and weather had not had the same effect. The only damage I wanted the Warhammer to have been where it had once been used.
For this project I made two versions or rather two variations of uv set up. The first is the one that I used in engine with a more budget friendly uv and resolution set up using only two separate materials for each. For the anvil; one material for the chains and the other for the main body of the object. For the Warhammer; one for the hammer head itself and one for the handle.


The other variation that I created used udims for the anvil and the same uv set up for the Warhammer (as I was happy with resolution and texel density in my first rendition). This however was not the case for the anvil as I felt the quality was good enough for use in game but not high-ers screen shots. I used 4 uv slots across the u axis. I completely understand that this is excessive by industry standards, but I felt that this was needed in this case to try and make the most of my work.
Once texturing was complete, I exported models and textures over into Marmoset Toolbag. The latest release is ready to go to work with udims which made importing and applying texture maps effortless. Once everything was applied, I rigged a very simple 2 light set up and completed my final hero assets renders.
Overall, I am happy with the result. With each project I complete I am learning more and more, both from my successes and my mistakes! Sometimes I remember to learn from my mistakes and other times not. However, most of the time I am happy with the work that I produce and the progress I am making.
Lighting and Post Process
For me, this is always the trickiest part of a project. Using Unreal Engine I applied a post process volume and an environment light mixer quite early on. This allowed me a greater amount of control over, and an overall idea of, how my lighting setup, and fog height, amongst other factors would affect asset placement and orientation.
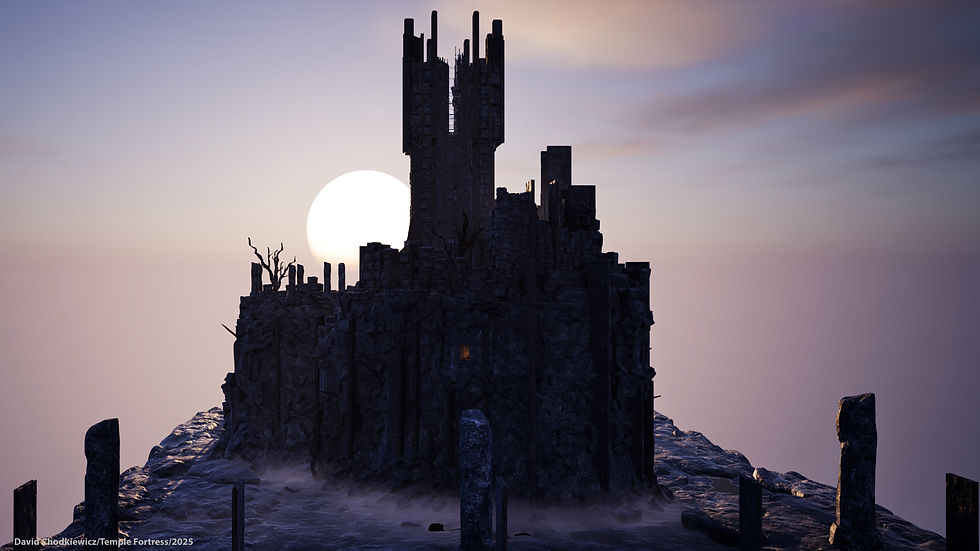
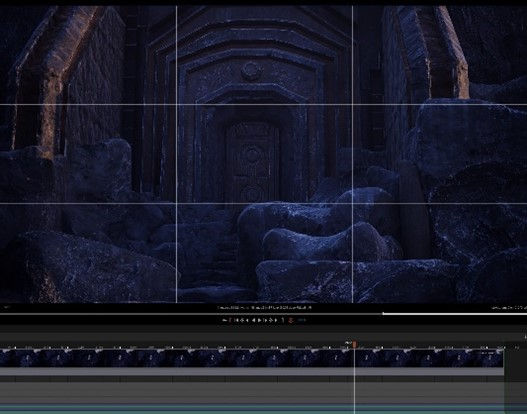
I wanted the overall feel of the scene to be mysterious and shrouded in mist and rolling fog. Unfortunately, this didn’t go as planned! The fog materials I had created combined with my lighting and exponential height fog set u, p all contradicted each other and no matter what I tweaked or adjusted I just wasn’t happy with the results. So, settling on just using the height fog to create the feel that I wanted I persevered through.

As you can see in the above picture, I tried several different combinations throughout the build but none of them felt right. Eventually I lowered the density and height of the exponential fog enough that it blended out the horizon. I lowered the angle position of the sun which can be controlled via the directional light settings, whilst doing this I also increased the scale of the sun to give more of a sunset dusky feel. For the fog I decided to keep it basic and created a simple fog material, I then applied this to a sphere and dropped, duplicated scaled and set them about my scene where appropriate. I also made use of the dash plug in which I subscribe to and brought in some ready-made fog cards. These were mainly used on my pathways and under the main alter area, very simple and easy to use but very effective and quick to apply. I also used dash’s inbuilt water generator to create the pools of water that can be seen dotted around my scene.
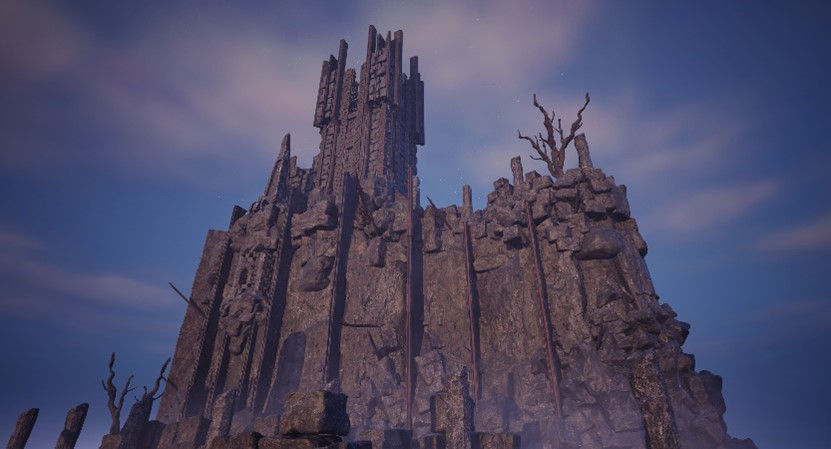
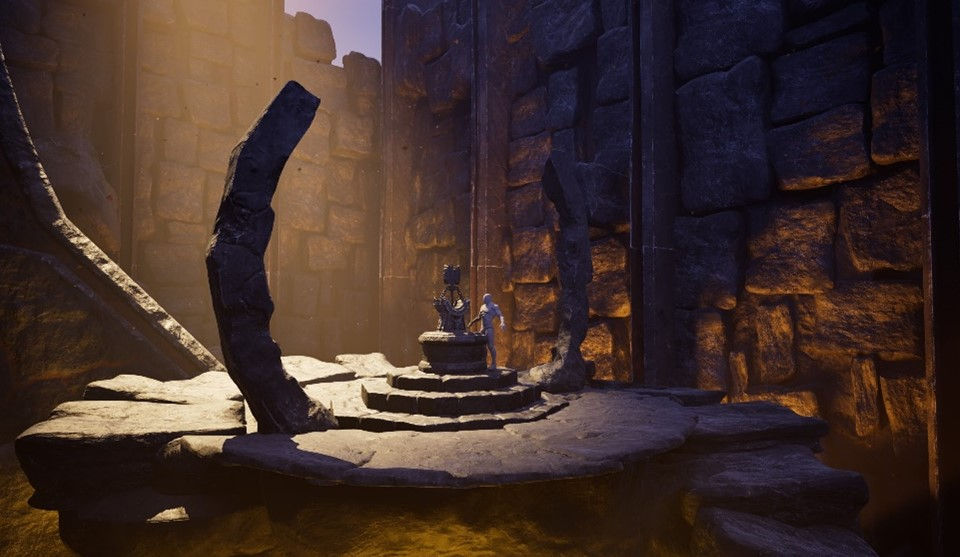
As can be seen in the above image, after all final adjustments were made and final effects were applied, I have ended up with a scene that can be clearly seen yet still retains a little of the haze that I was wanted.
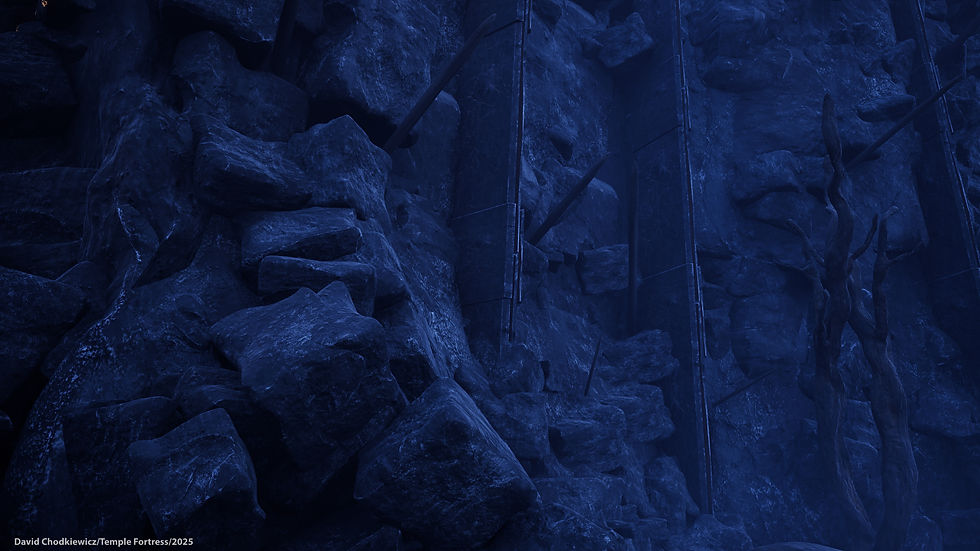
In other areas I made use of a few spotlights. These were in the turrets which can be found built into cliff faces and in the abyss which is located under the alter rock in the main part of the building. For the turrets I kept the lumen to a minimum to only give a hint of light to suggest a presence and for the abys lighting I ramped the lumen up to try and give the impression of some magical force at play. The only other spotlight I made use of was to give some illumination to my hero asset. This combined with a simple fog material and a self-made lighting gobo meant I could create and control a god ray which shone down upon my hero asset, giving it a sense of something magical. Overall, I am happy with how this turned out.
Cinematics
This part of the process for me is straight forward to set up, creating a master level sequencer in which I can add my shots I was ready to go. The difficult and pretty tricky part is getting, and capturing the right shots, something that I feel I’m still not proficient at. In total I produced 12 sequencer shots which as they were finished were added to my master sequencer to build up my cinematic render. I didn’t want to make my render too long so opted for a time of around one to one and a half minutes.
When I introduced the camera acter I found it was more straightforward to lock my viewport directly to the camera. This gave me an immediate view of what the camera was seeing enabling me to make alterations and adjustments with ease. As I previously stated, I produced twelve sequencer shots and when put into the master sequencer were not arranged in any order. Once I was happy with my render in Unreal Engine, I exported my movie render and reimported it into Clipchamp. This is free video editing tool that allows you to snip, copy, paste and edit your movie render. From here I cut my render up into their relevant sequences, cut out any unwanted frames and rearranged them in way that worked and seemed right for me. Very quickly my render had come to life, and I had a movie.
The next step was to add music. For this I used pixabay.com (Epic Drums Pixabay, Date unknown) where I managed to find a sample of music that I felt worked with my scene. By using clip champ this was very easy to apply and edit with fades. Overall, I am happy with how the cinematics have turned out but again this is something which I will be giving some time to research and practice over the coming summer months.
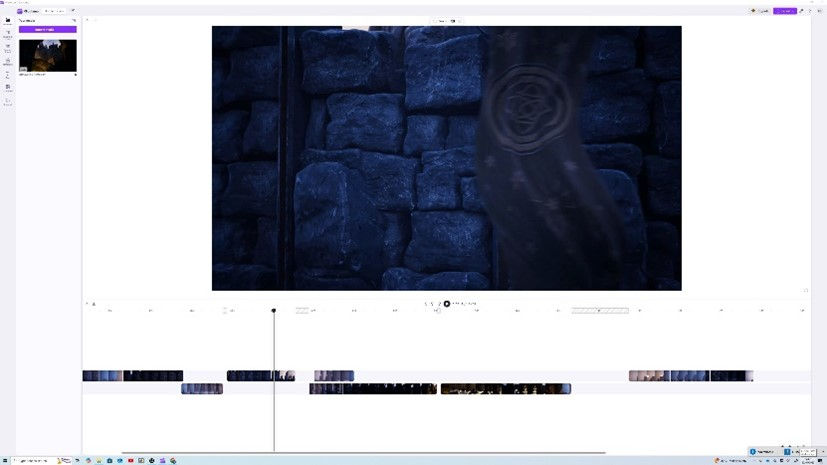
The above image shows the Clipchamp user interface.
Conclusion
For me this project has been a huge challenge from the start has tested my patience, skill level, creativity, resolve and to be honest has had me wanting to pull my hair out on so many occasions! On reflection, the plans and ideas I had in the beginning did not quite turn out the way I had intended, with only a few of my original concepts coming into fruition in my final cut. This is something that I need to work on.
This project has taught me many lessons. I have elevated my skill set, challenged my own creativity and sources of inspiration and learnt new ways of working and new techniques which I look forward to implementing in future projects.
I have pushed myself out of my comfort zone and despite the challenging this has brought I have learnt more than I would have if I had stuck to what is comfortable for me.
I am very much looking forward to moving onto the tasks and projects in my third and final year of university and have an opportunity to implement the learning from this project and others. I have identified that I need to improve on making better use project planning and time management strategies; over the summer months I intend to complete some tuition on software such as Substance designer and to spend some time to build upon the new skills that I learnt this year.
Although I have had some unsuccessful ventures on this project, I have also had positive ones. I have greatly improved on my hard surface modelling for example, and I have also gained a better understanding of the things that I like and dislike. For example, I prefer to create the smaller pieces in a scene such as the props over larger scenes and environments. I look forward to having the opportunity in year three to practice and experimentation further with this. There are many assets and props that I created for this project with various iterations, and it is a shame that they didn’t make it through to the final piece.
Despite the frustration I have felt at times, I have thoroughly enjoyed this project and all the challenges and obstacles it has thrown at me.
I am happy with my final scene, but it is important I am aware of the areas that have let me down. This is a learning space, and I am excited to embrace my final year and continue to work hard to improve the quality, consistency and my own knowledge so I am able to create the final pieces and scene I envisage.
References
Brainchildpl. (2021) Easy Tileable Stylised Grass (IN 2 MINUTES) Substance Designer BASICS | PBR Game Texture. Available at: https://www.youtube.com/watch?v=CzZi342lCx8&t=3s. (Accessed 5th March 2025).
Pixabay. Epic Drums. Available at: https://pixabay.com/music/upbeat-epic-drums-216819/. (Accessed 30th April 2025).
Poly Doorway. (2023) Stylized Ground Dirt - Substance Designer 3D. Available at: https://www.youtube.com/watch?v=EY4HdcOlw4c&t=155s. (Accessed 27th March 2025).
Strzalkowski,T. (Date Unknown). Available at: https://www.artstation.com/tomstrzal. (Accessed: 25th March 2025).
Takerefuge3d. (2023) 3D Coin Material - ZBrush and 3D Substance Designer. Available at: https://www.youtube.com/watch?v=Iv1xhl6Q_gk&list=PLq_Eh5DOdfV8DPAiY62LXj5aaQXXVfwGN&index=8. (Accessed 27th February 2025).
3dextrude. (2020) Substance Designer - Stylized Floor Path. Available at: https://www.youtube.com/watch?v=2Oe_ADd-OnE. (Accessed 1st March 2025).
Comments