THE HANGER GAM370
- david chodkiewicz
- Dec 28, 2025
- 6 min read

introduction
For the GAM370 professional portfolio module this was a great opportunity for me to get my teeth stuck into a project that really excited me, pushed my skills and enabled me to hone in on the keys areas that interest me. Right away I knew that I wanted to create a sci fi piece as this is mainly where my interest lies and I also knew that I wanted to create a spacecraft of sorts. With my main focus being set on developing my hard surface skills I really wanted to create a piece that was as realistic as I could achieve. Unfortunately due to a large number of technical issues this wasn't possible for me to achieve and from quite early on in the project I realised that I was going to have to produce something a little more stylised. Which although was disappointing and frustrating at the time by the end of the project I was pretty much satisfied with the overall result. With technical issues now fixed, pushing my work further and trying to achieve realism will be something that will be saved for my next piece.
ideas and block out
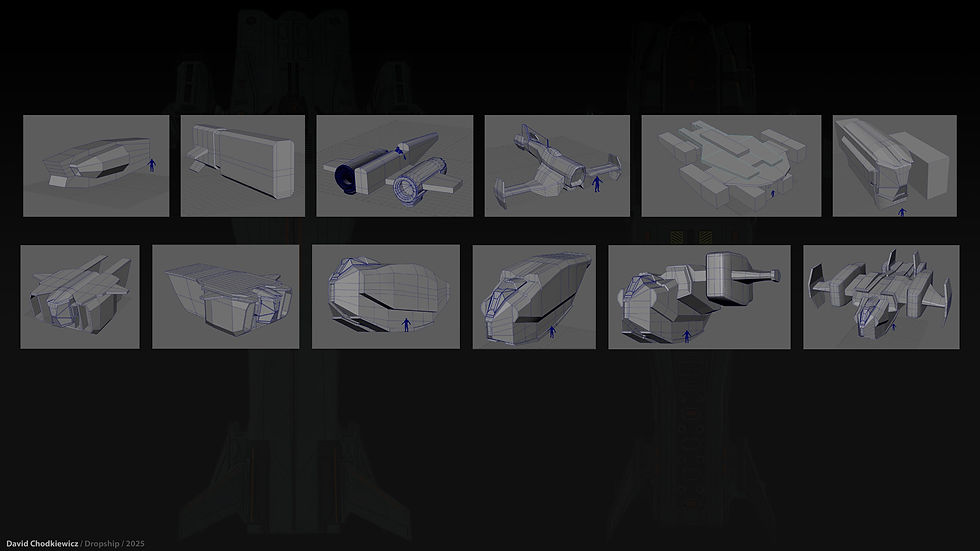
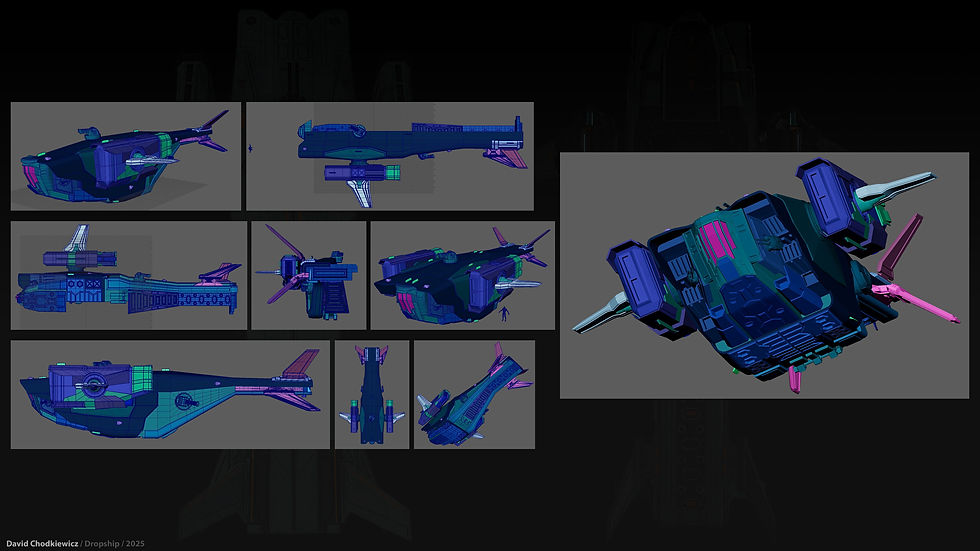
As previously stated I knew I wanted to create a spacecraft but what kind was still undecided. I toyed with everything from gigantic capital ships and destroyers to cargo vessels and tugs. In the end I narrowed it down to two choices, either a fighter or a dropship. Working better and faster in 3d I got to work on blocking out various vehicle ideas, concentrating on form and shape language I soon had a series of very rough block outs to choose from. It became very clear quite quickly for me that I wanted to create a dropship. Again working through a series of block outs with some more refined than others I eventually arrived at my chosen design. A heavily armoured, well equipped troop dropship. After spending a little time on my initial iteration it became quite clear that this design was not working for me so with some major refence hunting and some very big changes I arrived at the beginnings of what would be my final piece.
detail pass
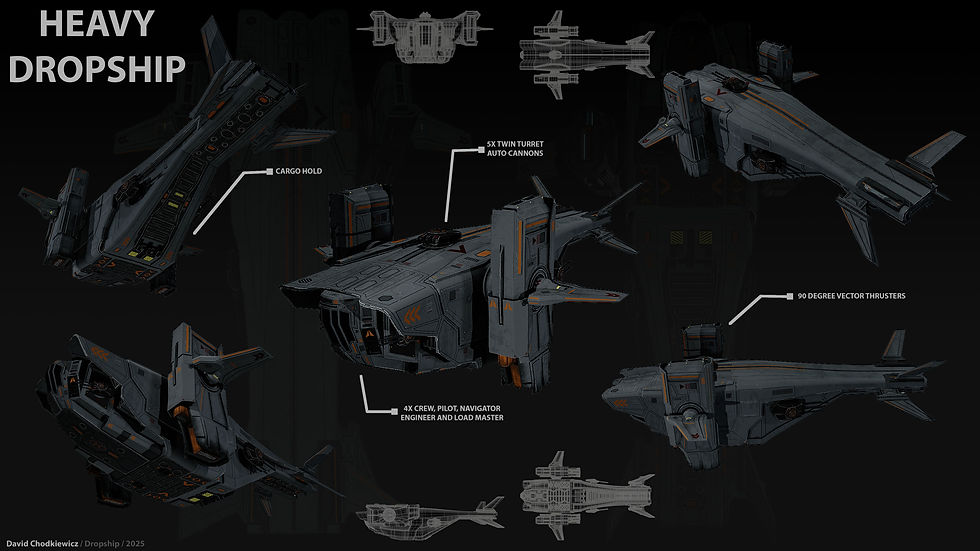
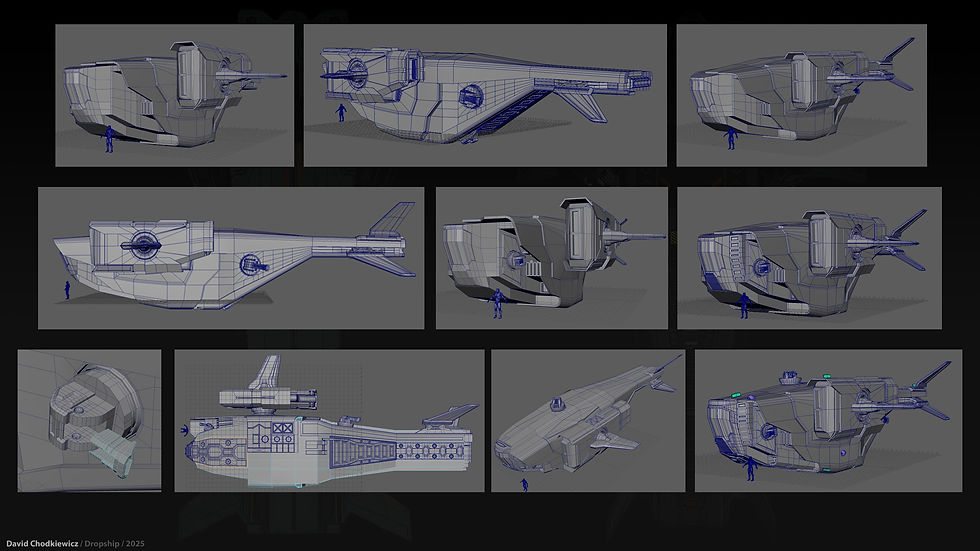
With my initial block out complete I then began the process of refining and adding details to my dropship. Working on only the right hand side and centre section of the dropship only would cut down on a lot time modelling and unwrapping and once complete all I would simply have to do is select all right hand parts mirror them, separate them into they're own individual components and reassign they're naming conventions accordingly. I decided to keep small details and greeblies to a minimum as I felt that they would make it feel to vulnerable with many small crucial working parts that would be exposed and easily hit if it were being attacked. I instead opted for a more heavily armoured look and would add details in the form of panel lines and maybe a few hatches of sorts that could be done when applying textures. This approach would save on poly count and be less costly overall.
The main areas where I opted for adding details were on the underside where a little more armour would be needed and where landing gear would possibly be located. I also added detailed parts at the rear where the cargo door is located. My initial idea was to have this door animated so it would open and reveal the inside. But unfortunately time didn't allow for this and this will be something that I come back and revisit when time allows. Cannons were also added, two on each side and one on the top. My first initial pass I was not happy with so later on these got scrapped and redesigned. The original versions I felt were too clunky and needed to be something a little sleeker. As each part was made and completed it was also unwrapped and assigned its own material attribute ready for mirroring later on once all parts were complete.
TEXTURING
For my texturing process I wanted to keep things nice and simple and work solely in Adobe Substance Painter. Firstly I created a base smart material. This would allow me to keep the overall look of my dropship pieces cohesive and would allow me to make subtle changes where needed, such as where maybe a wanted a panel to be a slightly darker shade or have slightly more wear and tear on areas that maybe more exposed to the elements or potential damage.
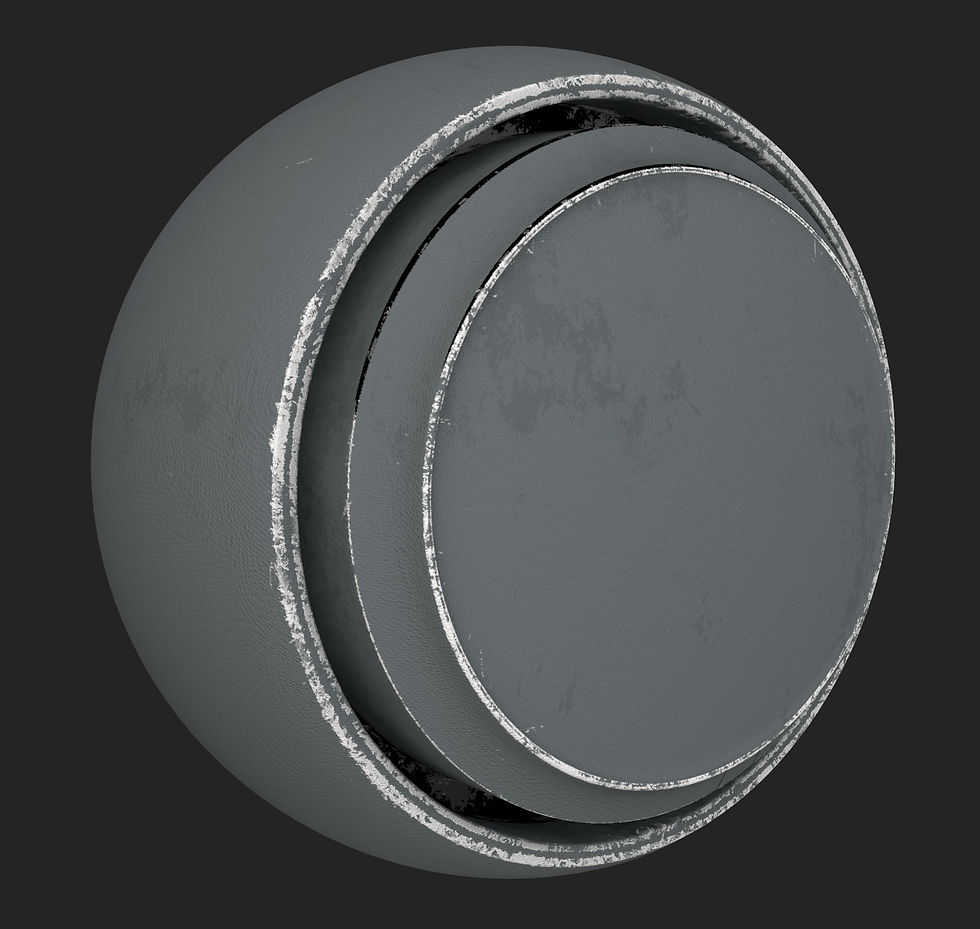
This smart material was created starting out with a base fill layer, a Perlin noise layer and several layer of smart masks to apply effects such as edge wear and cavity dirt.
After making my base material I then went through the process of exporting my dropship parts in small batches and applied my textures, decals and other painterly effects. Working this way for me on this project meant I could batch out the work load and move through it quite efficiently again making sure I kept everything cohesive.
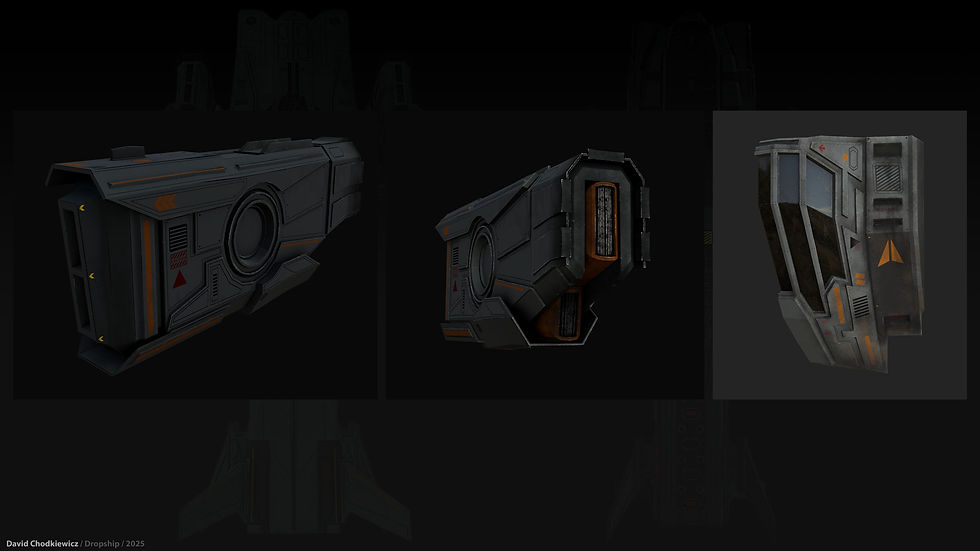
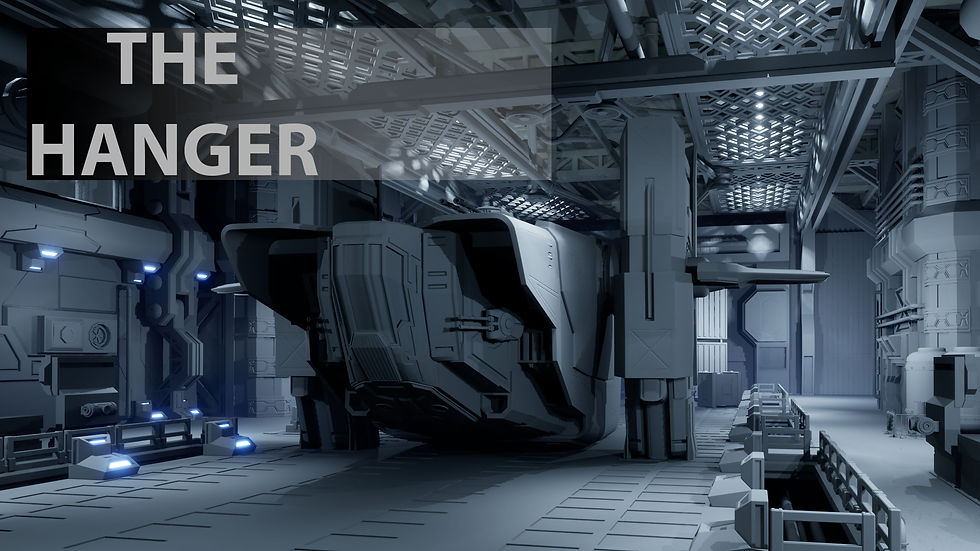
After all parts were textured I then exported the model parts and texture maps into Marmoset tool bag ready for rendering. Soon after materials were applied it became clear that the dropship alone was not enough, it looked lonely and needed a hanger to sit in.
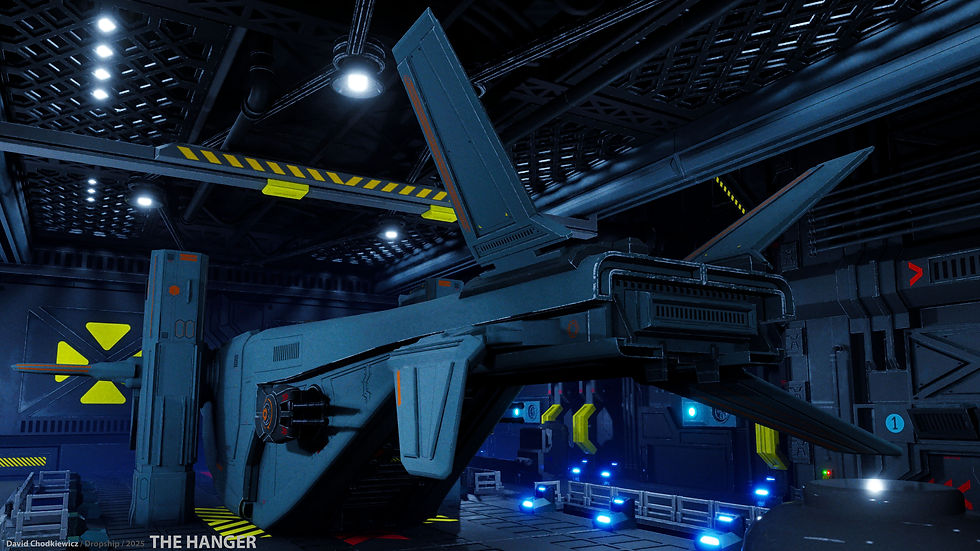
creating and texturing the hanger
For the hanger I put together a very rough mood board and got straight to work. Using Maya I put together a model kit that could be fit and be built around the dropship.
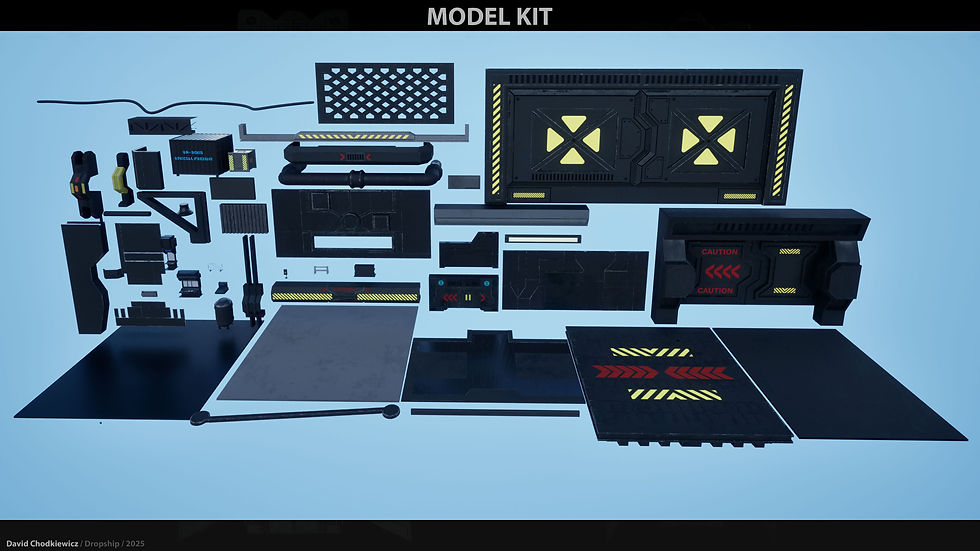
I used the same process of modelling and texturing that I had used for my dropship. Whether it be right or wrong I found this process worked well for me. Again starting out with a block out then moving on to a detail pass making adjustments, unwrapping and assigning materials as I went. With in no time my hanger was complete modelled, unwrapped and textured.
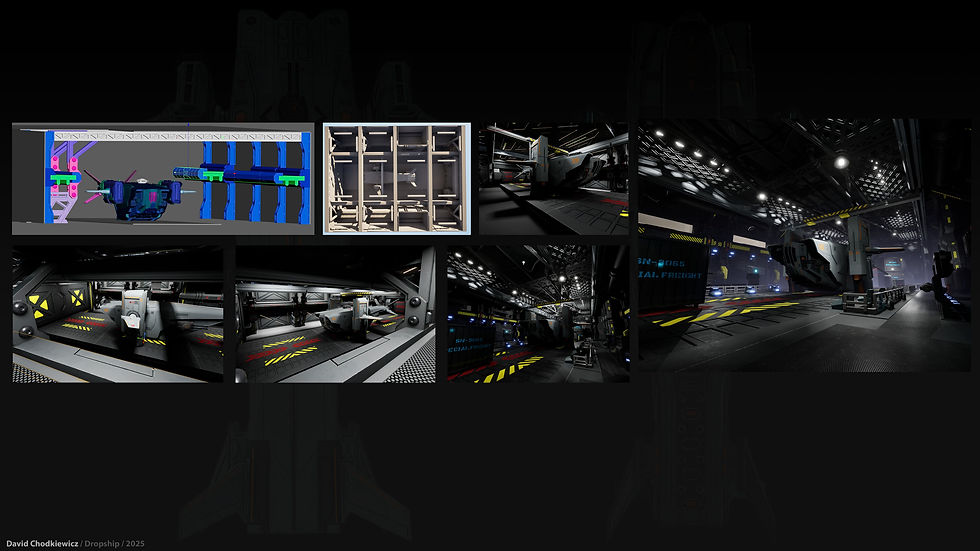

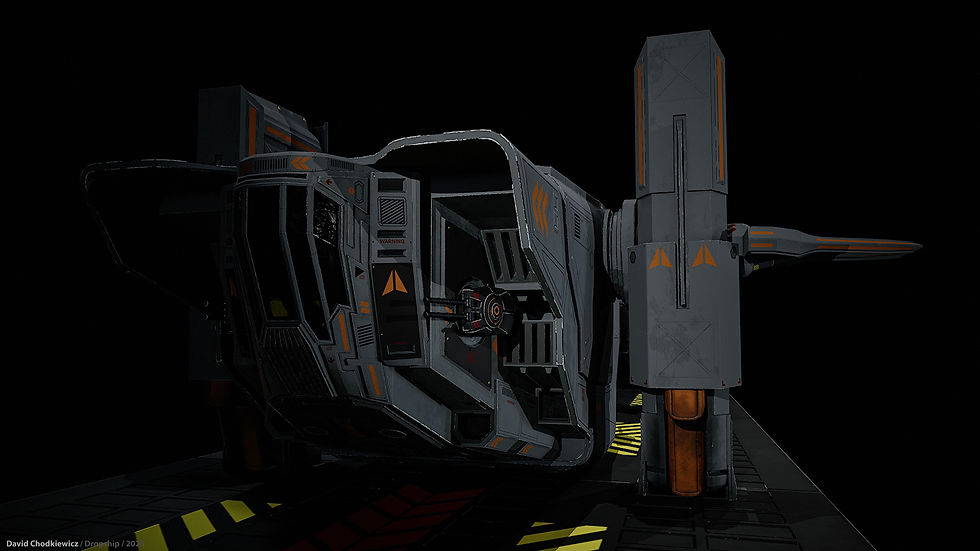
Final renders
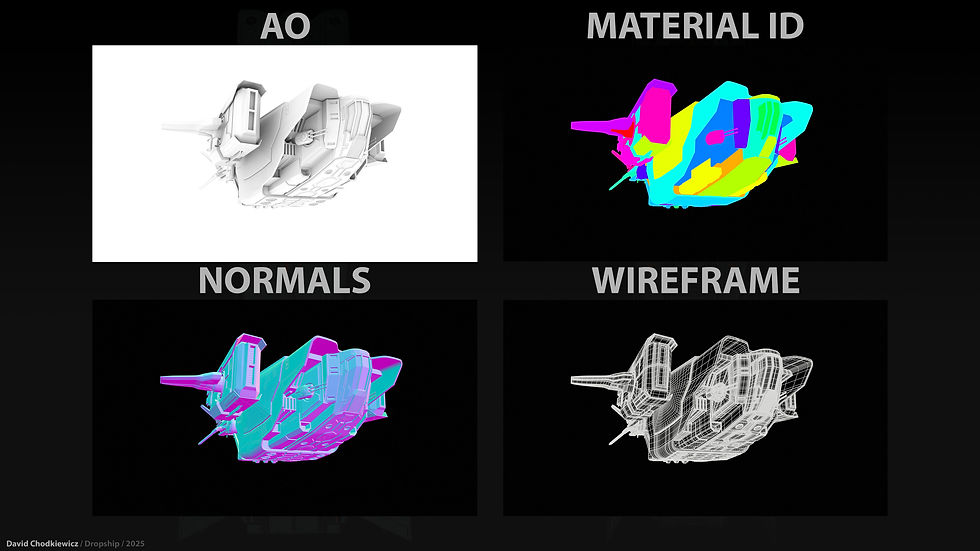
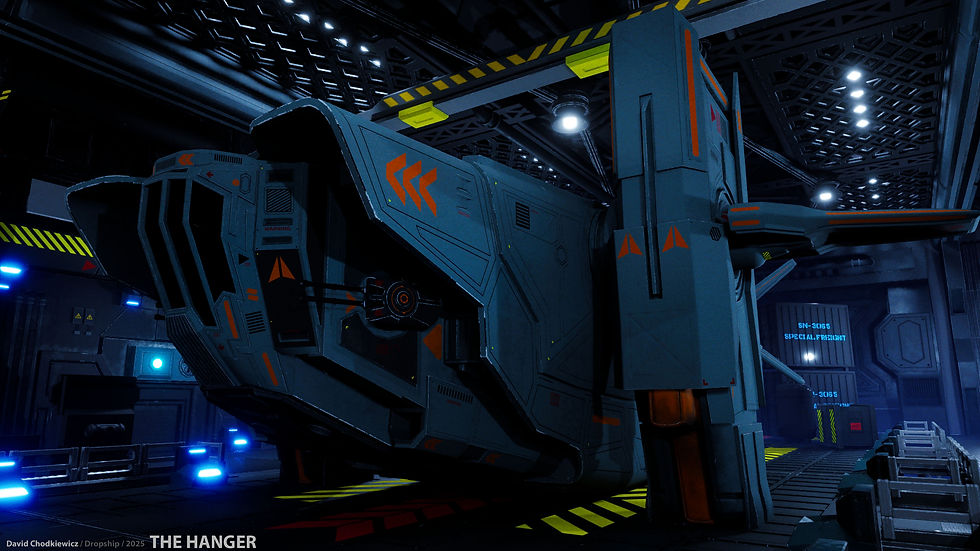
For my renders I had to split my work load in two. For the dropship itself as previously stated I used Marmoset tool bag and for the dropship in its hanger I used Unreal Engine 5.6. Using Marmoset for the dropship alone I feel gives me a lot more control over lighting and enables me to show my work in a way that Unreal cant, for example setting turn table animations. I feel that Marmoset is a lot more user friendly and is great at what its supposed to do. Using this feature in Marmoset also allowed to show wireframe, AO, normals as well as base colour in one turn table shot.
And for the dropship in its hanger scene, once materials were applied and lighting in place it was then going through the process of making the lighting work with the whole scene. This was especially tricky as I had so many different light sources all interacting with each other from many different angles. With the bulk of the light being emitted from the over head spot lights and the emissive light being shone from the numerous floor and ceiling lights, it just wasn't working. So I decided to scale the emissive lights down to a minimum and lowered the lumen for the spot lights. I brought in post process volume and a local fog volume and adjusted the directional light. Which although my hanger was completely enclosed still effected how the fog reacted. Eventually using the post process volume to make some subtle changes to the lighting and adding colour correction I eventually got my scene to a point where I was happy. From here it was a simple case of setting up various camera actors and taking my desired hi res screen shots. I then used those same camera actors to put together a series of level sequence shots which I would then put together for my final cinematic.


conclusion
In short, this has been a rollercoaster of a project for me. Having been plagued by technical issues which were eventually fixed and the project not going in the direction that I initially had planned, I feel happy enough with the end result. Its been great learning new modelling techniques and exanding upon my knowledge of substance painter. Hopefully in my next project I can take these new found skills and go on to push myself further and produce bigger, bolder and better work. Thank you for reading through this and I hope you have enjoyed looking at this piece of work.

Comments